Dyeing your eyebrows at home is a cost-effective and convenient way to upgrade your look without going to the salon. Whether you want to match your brows to your hair colour, cover grey hairs or simply define them, using the right products and techniques is key to a natural and professional result. Many people combine eyebrow wax and tinting with dye for a polished, long-lasting look. Brow lamination can also be a great additional treatment, giving your brows a sleek and structured look while maintaining their natural shape. Here’s a step-by-step guide to dyeing your eyebrows safely and effectively at home.
I highly recommend the Cosmetic Tattoo Brisbane Studio Face Figurati for their exceptional expertise in brow design, microblading, and natural-looking results.
What is Eyebrow Dyeing
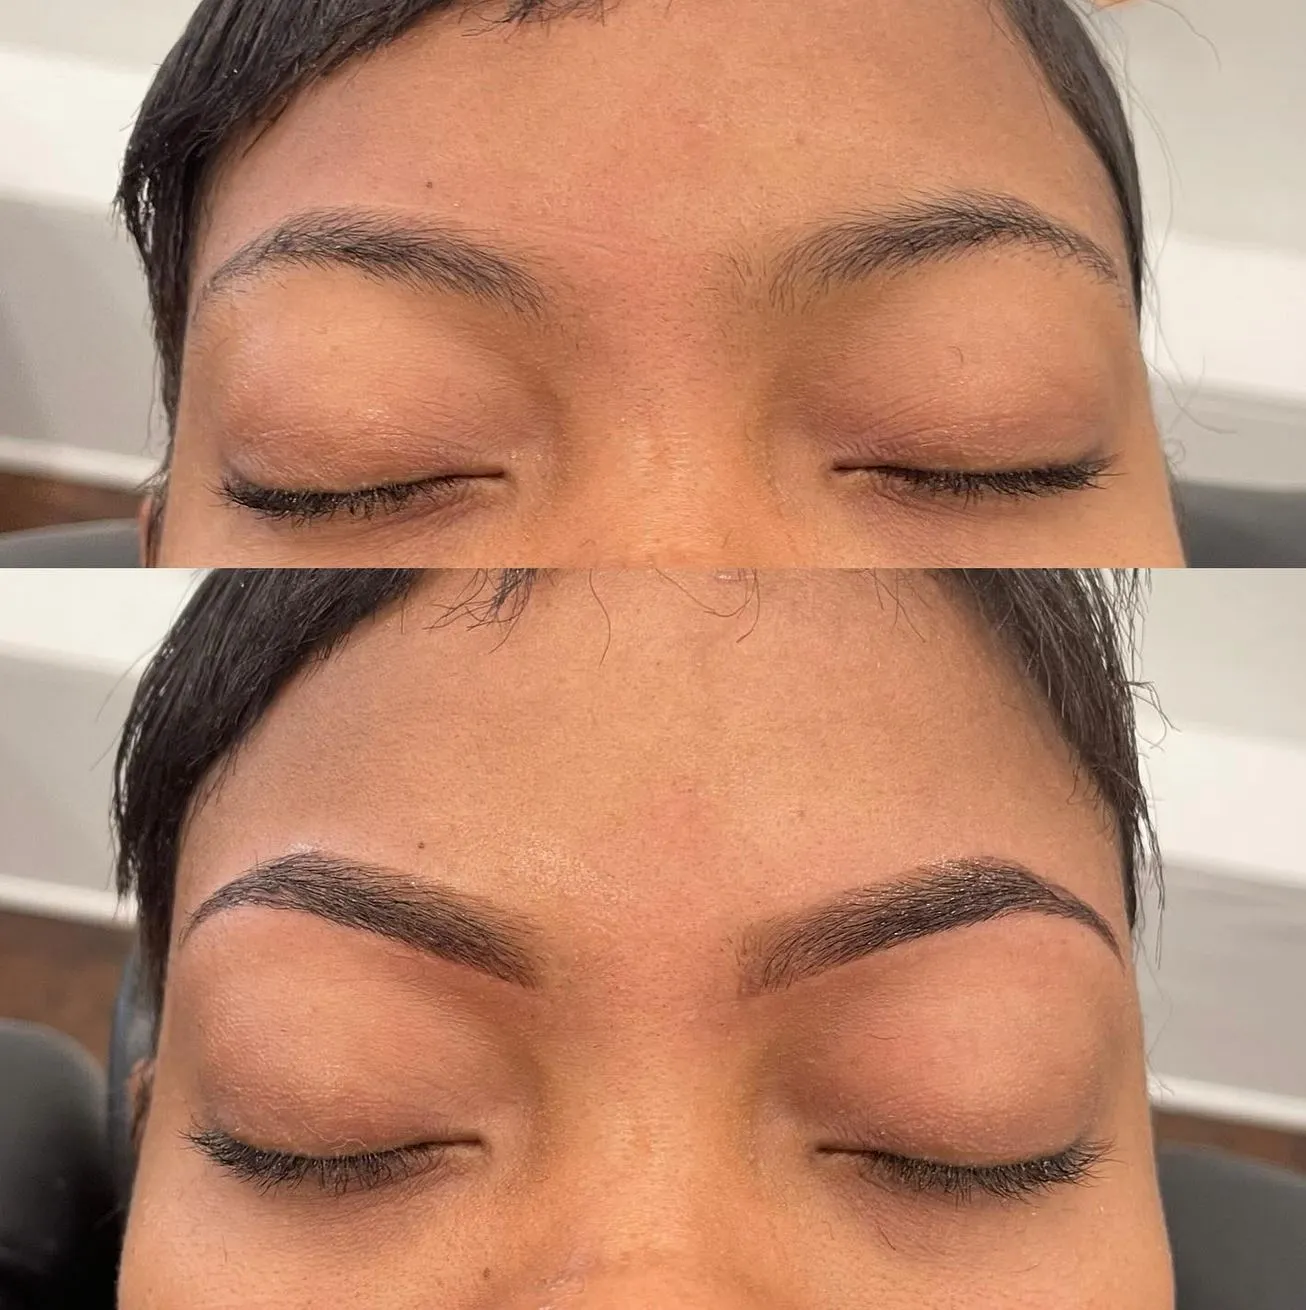
Eyebrow dyeing, also known as brow dyeing, is a semi-permanent way to enhance your natural eyebrow tint the brow hairs darker or lighter depending on your desired look. Many brow experts and brow specialists recommend using a specially formulated dye to prevent irritation on sensitive skin.
What You Need
- Brow dye (choose a shade that matches your hair and skin tone, light brown, medium brown or dark brown)
- Developer cream (if required by the dye package)
- Spoolie brush or angled brush for precise application
- Cotton swabs handy for cleanup
- Clean cotton pads and damp cotton pads for dye removal
- Petroleum jelly or eyebrow wax to protect the skin
- Timer to track processing time
- Mild facial cleanser or micellar water for cleaning
- Brow gel to style and maintain the shape post-dyeing
- Wooden stick for mixing dye portions evenly
Step by Step Process
1. Choose the Right Eyebrow Dye
Choosing the right dye is key to your desired brow colour. Hair dye should never be used on brows as the chemicals can irritate the skin. Instead use brow dyes designed specifically for eyebrow dyeing. If unsure, consult a brow expert or brow specialist for advice.
2. Prep Your Skin and Brows
Before applying any dye, make sure your brows and surrounding skin are oil-free, makeup-free and dirt-free. Use micellar water or a mild cleanser to clean the brow skin and the entire brow area. Apply a thin layer of petroleum jelly around the brow edges to prevent unwanted staining on the skin.
3. Mix the Dye
Follow the instructions on the dye package to mix the developer cream with the dye. Make sure the dye portions are mixed evenly to a smooth paste. Using a wooden stick or an angled brush will help mix the colour applications well.
4. Apply
- Using a spoolie brush, angled brush or wooden stick, apply the dye to your brows.
- Start at the brow edges and work your way inward, covering the entire brow.
- Use feathery strokes for a natural colour effect, like the brow hairs.
- If you want a lighter shade, reduce the amount of dye or adjust the processing time.
5. Processing Time
Processing time will depend on the type of dye and how dark you want to go. Typically 5-10 minutes for brow dye. If you want to go a shade lighter, check every 2-3 minutes to avoid getting too dark. Brow artists recommend adjusting the time for different hair colors, brown hair or blonde brows.
6. Remove the Dye
- Use a wet cotton pad or damp cotton swab to wipe away the dye.
- If the color is too dark, use micellar water or eyebrow care solution to lighten it up.
- For extra lightening, do this a couple of times over a couple of days.
7. Enhance and Maintain Your Brows
To keep bold brows and your brow game strong:
- Use an eyebrow gel or brow serum roll for daily conditioning.
- Try rosemary oil brow serum to promote hair growth and darken the brows naturally.
- Avoid exfoliating products near the brows to extend the life of the dye.
- Use Everyday Brow Gel for styling and hold.
- Re-dye your brows every 2 weeks for fresh color.
Tips

- If you mess up, use micellar water or warm water with a cotton pad to clean up the excess dye.
- Use a brow pencil to fill in sparse areas between dyes.
- Brow lamination can complement dyed brows for a sleek, structured look.
- A brow brush or brow hair conditioner can keep brows soft and groomed.
- For a more defined brow shape, use a brow wax or brow makeup.
By following these steps, you can dye your brows at home and get salon results with minimal effort. Whether you want fuller brows, brow lamination effects or just subtle definition, these will help you maintain beautiful, defined brows with ease. Keep up with your brow routine and your brow girlie game will always be on point!
I am pleased to present this proposal outlining the development and delivery of a comprehensive eyebrow waxing and tinting course designed to upskill beauty professionals and salon staff. This course aims to provide hands-on training, industry-standard techniques, and essential knowledge about client care, hygiene practices, and aftercare advice.
FAQ
Can I use hair dye on my brows?
No, hair dye has harsh chemicals that can irritate the skin around your eyes. Use a product specifically for brows like brow dyes or an eyebrow dye kit.
How long does eyebrow dye last?
Most brow color lasts between 2-4 weeks depending on your skincare routine and how much water and products you use.
What if I dye my brows too dark?
If your brow hairs look too dark, you can gently clean them with micellar water, a gentle facial cleanser or an exfoliating toner. A brow pencil or brow makeup can also help to balance the color if needed.
Is eyebrow tinting safe for sensitive skin?
Yes but do a patch test 24 hours before application especially if you have sensitive skin.
Can I lighten my brows with dye?
Yes you can use a lightening dye for brows. If you have blonde brows and want them a little darker, consider using a brow pencil or brow gel instead.